Thursday, February 28, 2019

Easy Watercolor Backgrounds

Watercolors are one of my absolute favorite kinds of art and crafts. The colors are always so soft and beautiful, but sometimes it's hard to achieve this type of look if you are a beginner. Here is a super simple and easy trick to creating gorgeous water color backgrounds for any occasion or craft! You'll need a set of watercolors (mine are the cheap ones we had in grade school), a spray bottle, a ziplock bag, and a paint brush.
The first step is picking out the right kind of paper. Because we are using watercolors, it would be best to use a lighter color of paper that is thick like card stock or scrapbooking paper. The paper I used for this project was not as thick as card stock and a cream color. Next is to get started on painting! For this trick we are going to paint on the ziplock bag (sandwich or gallon depending on the size of your paper and desired background). Paint in a consistent line or pattern, switching hues or colors without overlapping them as shown below.

The next step is to take the spray bottle and spray at least 1-2 sprays of water onto the paper you want your background on. Then flip the ziploc bag onto the wet paper and water the colors spread and mix! For this step you can manipulate and move the colors around with your finger to achieve the desired look. Next take the ziplock bag off of the paper and let dry. You can reuse the ziplock bag just by wiping off the watercolors with a dry cloth and painting it again. Below are several different colors and patterns I tried (the colors are still wet, and will look better when dried.)

Once the paper dries feel free to try again with different colors, write a cute phrase, gift or keep as a personalized craft! I used this project to create a name tag/ label for someone and mounted it on card stock for extra sturdiness. I hope you enjoy this easy way to be crafty and look like a pro at watercolors! #doodledart for me to see your creations!


Thursday, February 21, 2019

Thursday Clothing Deals

Here are links to cute clothing I've found today! These are all daily deals and will only last a day or two with limited quantity, so get it while you can. Enjoy these finds!

Boyfriend Tie Tees: Comes in many colors and is such a cute a lightweight top for spring! Get it here: http://shrsl.com/1gmrx

Cushioned Collar Sneakers: These are such a staple for spring! I am so excited to start to wear lightweight, comfy and cute shoes! Get it here: http://shrsl.com/1gms7

Bubble Sleeve Tunic: Comes in three colors and has free shipping! Get this deal before its gone! Get it here: http://shrsl.com/1gmt9

Floral Baseball Tees: Super cute for under $20! Quarter sleeve with elbow patches- whats not to like!? Get it here: http://shrsl.com/1gmt1

Striped Tee: This top is another under $20 and is such a staple in anyones closet! Get it here: http://shrsl.com/1gmto

Bold Strip Modest Dress: This dress is so flattering and can I say the perfect Easter dress? Get it here: http://shrsl.com/1gmtw

Thursday, February 14, 2019

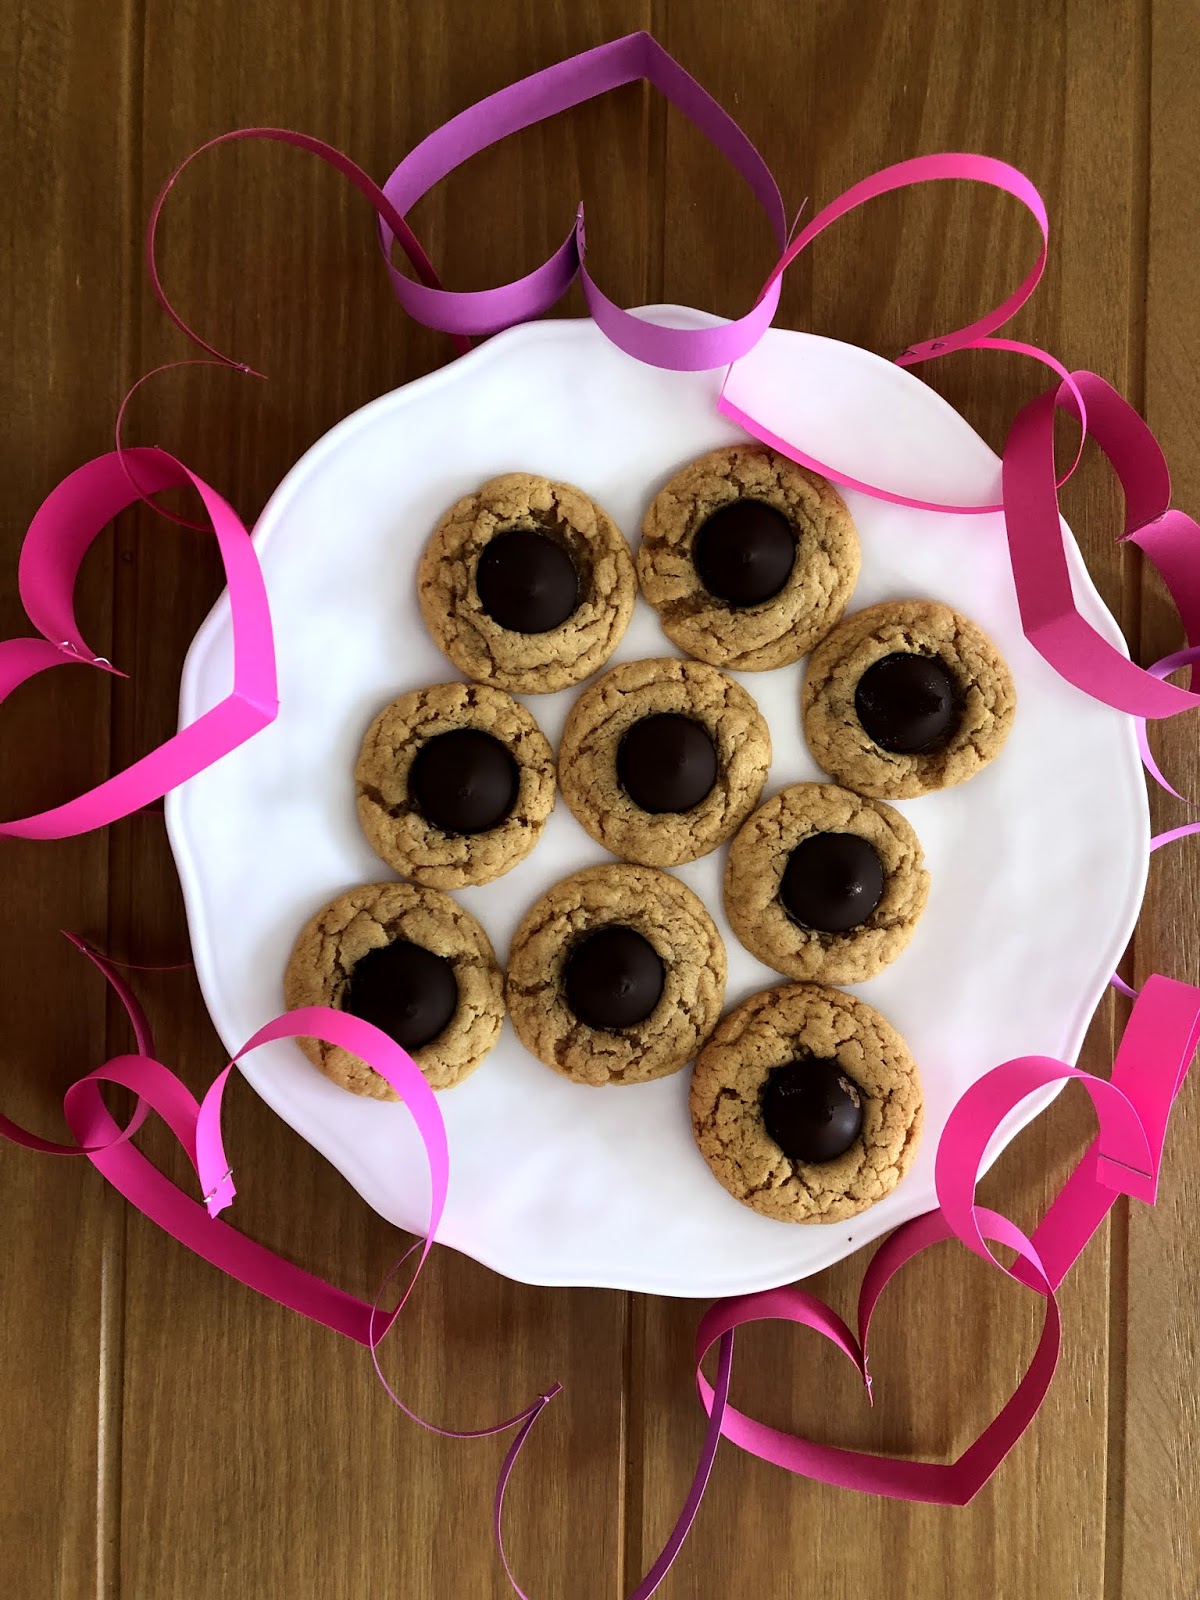
Peanut Butter Kiss Cookies

These cookies are so delicious and SO EASY! They make for a quick and sweet treat for holidays and parties! I made these for my husband for Valentines Day and used dark chocolate kisses instead of milk, as dark chocolate (and peanut butter) is his favorite.
Here's the recipe:
1 package of Betty Crocker Peanut Butter Cookies
1 egg
3 T water
2 T oil
1/2 cup sugar
about 40 Hersey Kisses

Make the Peanut Butter Cookies according to the package adding the contents, egg, water and oil to a mixing bowl. I mixed mine in my Kitchen Aid for under 5 minutes, until the batter was slightly sticky. Next preheat the oven to 375 and use your hands to roll the batter into balls. If you want bigger cookies, each ball should be about an inch wide making 24 balls. If you want smaller cookies, roll about 36 balls making them around a 1/2 inch wide. (Look at the photos to see how the smaller balls turned out!)

Next place the sugar in a bowl or flat container and gently coat each peanut butter ball, then transfer to a greased or silicon lined baking sheet. If making bigger balls, place them in the oven for 8 minutes. If making smaller balls, place them in the oven for 6 minutes.

While the cookies are baking, unwrap Hersey Kisses and set aside. Once the cookies are done, take them out of the oven and press a Hersey Kiss into the middle of each cookie. Let the cookies sit for about a minute before transferring to a cooling rack.
If you want the Kisses more melted, or if using dark chocolate Kisses, place back in the oven for 30-45 seconds, then take out to cool. Best eaten within 15-20 minutes while the chocolate is still soft! Enjoy!


Saturday, February 9, 2019

Valentine's Day Craft

Here is a simple and cheap Valentine's Day craft you can do with kids or just on your own to add some love to your home!
Heart Chain
Supplies needed:
Construction or scrapbooking paper
Scissors
Stapler

First step is to cut long strips of colorful paper. With this particular project I did not use a straight edge cutter and just eyeballed it with scissors, and it turned out just fine! I tried to cut the strips about 1/2 - 1 inch in width.

Next is making your first heart to start the chain. Fold one strip of paper in half, creasing the fold. Then fold to to ends down creating a heart shape and use a staple to hold shape in place. See image below.

Then to add onto the chain simply fold and crease the next strip of paper and loop it through your previously made heart. Fold the two ends down to create the heart shape, staple, and repeat.

Make the chain as long as you'd like and place around a door frame, on the table, around a bookshelf or simple hang as a banner. This is such a cute, fast and festive way to decorate for Valentine's Day!


Monday, October 29, 2018

Spider Greeting Cards

Happy Halloween! The holidays are such a great time to be indoors and break out the crafts. Here is a simple DIY card decoration for Halloween out of buttons, paper, string and glue. The paper for the cards are no specific measurements, as the envelopes I have are not standard ones. But break out some fun orange card stock or scrap-booking paper, your collection of buttons, and tacky glue to get creative!

Thursday, May 3, 2018

Remodel Your Plants

It's spring and starting to warm up which means gardens and plants! I recently bought some plants that came in these ugly, thin, plastic, and cheap containers. Instead of buying some new pots/planters, this is a simple way to transform those ugly containers to cute and chic!
First step is to collect all of your supplies. For this project I decided to use some craft rope, but you could easily use any type of string or yarn that you'd like. Next is to grab some tacky glue and prepare to get your fingers a bit messy! (Optional: transfer the plant to another container so that it is easier to maneuver the planter you are decorating.) I then cut the pointed edges of the container to be rounded and started gluing!
Place a strip of tacky glue along the container's edge, starting at one of the top corners. Then place the end of the sting on that corner, holding for a few seconds, and then placing the rest of the string on the glue. Continue this all the way around the planter, being as tight or as loose and you'd like. I made mine pretty tight, gluing each string right under the previous line. Once you make it to the bottom, glue the end of the string tilted slightly under the container to hide it, holding it in place for a few seconds. The tacky glue will dry clear and you will be left with a cute new container for your plants! 

Monday, March 12, 2018

Easy, Quick, Healthy Bread

This recipe is 100% whole wheat bread, 2 hours to make, not dry and so delicious! You don't even need a rolling-pin! I got the original recipe from An Oregon Cottage but here's what ingredients I used, and how it turned out!


Makes 2 loaves. 
2 1/2 cups of water
1 1/2 tbs of yeast
6 cups of whole wheat flour
1/3 cup olive oil
1/3 cup of honey
2 1/2 tsp salt

Add yeast, 2 cups of flour and warm water to a stand mixer. Make sure that your water is not hot but just luke warm to not kill the yeast. I used my Kitchen Aid mixer with a flat beater as the attachment and stirred the ingredients for 15 seconds. Let this sit for 20 minutes until the mix is "sponge like".

Add in the oil first, and then the honey and mix for a few seconds. Add in the rest of the ingredients; 4 cups of flour, and salt. Stir until dough becomes sticky, under 5 minutes. At this point, change the flat beater to the dough hook and bet for about 6 minutes. If the dough is still sticking to the sides of the bowl, you may need to sprinkle in more wheat. 

Oil 2 9x5 bread pans with cooking spray covering all corners. Take dough out on a floured surface and split in half with a knife. Shape to length and size of the bread pan, gently rolling and pinching seems together. Place both "loaves in a warm place and let sit for 50 minutes, covering with a towel. This step took about 60 minutes for my loaves to rise above the sides of the bread pan. 

Preheat the oven during the last 10 minutes of rising time. Place the pans on the same rack, cooking for 15 minutes. Rotate and flip the pans and place back in oven for another 15 minutes. 

After 30 minutes the bread should be done! Take out of pans and let cool for about 10 minutes. Cut into thin or thick slices, I got about 14 slices from each loaf. I store my bread in old bread bags that bread comes in from the store. Perfect way to store them!